")
A steady drip from the ceiling or a single shingle lying in your yard can spark immediate concern for any homeowner. The thought of a full roof replacement often brings visions of high costs, significant disruption, and a lengthy project. However, not every roofing issue demands a complete overhaul. For many common problems, a partial roof repair is a cost-effective and practical solution that can extend the life of your roof and protect your home.
This comprehensive guide empowers you to tackle common roof repairs yourself. We will walk through how to identify when a partial repair is the right choice, the critical safety precautions to take, the tools and materials you’ll need, and step-by-step instructions for the most frequent issues. By understanding the process, you can make informed decisions, save money, and gain the satisfaction of maintaining your most important asset.
Understanding Partial Roof Repair: When It’s the Right Solution
Before climbing a ladder, it’s essential to understand what a partial roof repair entails and whether it’s the appropriate strategy for your situation. This approach focuses on addressing specific problems in a limited area rather than replacing the entire roofing system.
Defining Partial Roof Repair: Scope and Benefits
A partial roof repair involves fixing a localized section of your roof that has sustained damage, while the majority of the roof remains in good condition. This could mean replacing a handful of missing shingles, sealing a leak around a vent, or patching a small puncture. The primary benefits for homeowners are significant: it is far more cost-effective than a full replacement, involves minimal disruption to your daily life, and can be completed much faster. When done correctly, a targeted repair can effectively stop leaks, prevent further damage, and prolong the overall lifespan of your roof.
Identifying Candidates for Partial Repair: Localized Damage Assessment
The ideal candidate for a partial repair is a roof that is otherwise structurally sound and relatively young but has suffered isolated damage. Common scenarios include:
- Physical Damage: A few shingles torn off by high winds or damaged by a fallen tree limb.
- Component Failure: Leaks around flashing for chimneys, skylights, or vents.
- Minor Punctures: Small holes caused by debris or foot traffic.
If the damage is contained to one or two small areas and the rest of your shingles are in good shape (not curling, cracking, or shedding granules excessively), a partial repair is likely a viable option. According to data from Instant Roofer in 2023, leaks are a widespread issue, and catching them early with a targeted repair can prevent them from becoming a major problem.
When to Consider a Professional or Full Replacement
A DIY partial repair is not always the answer. It is crucial to recognize when to call a roofing contractor. A full roof replacement is generally more practical if:
- The Roof is Old: Most asphalt shingle roofs last 20-25 years. If your roof is approaching the end of its lifespan, a partial repair is often a temporary fix for a systemic problem.
- Damage is Widespread: If you see damage across multiple sections of the roof, or if more than 25-30% of the surface is compromised, a replacement is more logical.
- Underlying Issues Exist: Signs of soft, spongy decking underfoot or extensive water damage in the attic point to problems beyond the shingles, requiring professional assessment.
Pre-Repair Preparation: Safety, Thorough Assessment, and Material Sourcing
Proper preparation is the most critical phase of any DIY roof repair. Rushing this stage can lead to ineffective repairs, further damage, or serious injury. Taking the time to prepare ensures you work safely and efficiently.
Prioritizing Safety on the Roof
Working at heights is inherently dangerous. Never compromise on safety. Before you begin, ensure you have the proper safety gear, including a roof safety harness, sturdy non-slip footwear, and safety glasses. Always work on a dry, calm day. Use a securely placed and stable ladder, and whenever possible, have a spotter on the ground who can assist you. Your personal safety is more important than any repair.
Conducting a Detailed Roof Inspection and Damage Assessment
A thorough inspection helps you understand the full scope of the repair. From the ground, use binoculars to spot obvious issues. On the roof, carefully examine the damaged area and its surroundings. Look for cracked, curled, or missing shingles. Check the rubber boots around plumbing vents and the flashing around chimneys for cracks or gaps. Gently lift a shingle near the damaged area to inspect the underlayment for signs of moisture or rot. Accurately assessing the damage ensures you purchase the right materials and address the root cause of the problem.
Gathering Essential Tools and Matching Roofing Material
Having the right tools and materials on hand prevents multiple trips up and down the ladder. Your essential toolkit should include a pry bar, hammer, utility knife, measuring tape, and a caulk gun. For materials, you will need replacement shingles, roofing nails, and roofing cement or sealant. Matching the existing roofing material is crucial for maintaining your home’s curb appeal. Take a sample of a damaged shingle to your local supplier to find the closest match in color and style. Be aware that when budgeting for your project, NerdWallet notes that material costs have seen consistent annual increases, so factor current pricing into your budget.
Step-by-Step Guide: Common Partial Roof Repair Techniques
With your preparation complete, you can move on to the repair itself. These techniques cover the most common issues homeowners face, providing a clear path to a successful DIY fix.
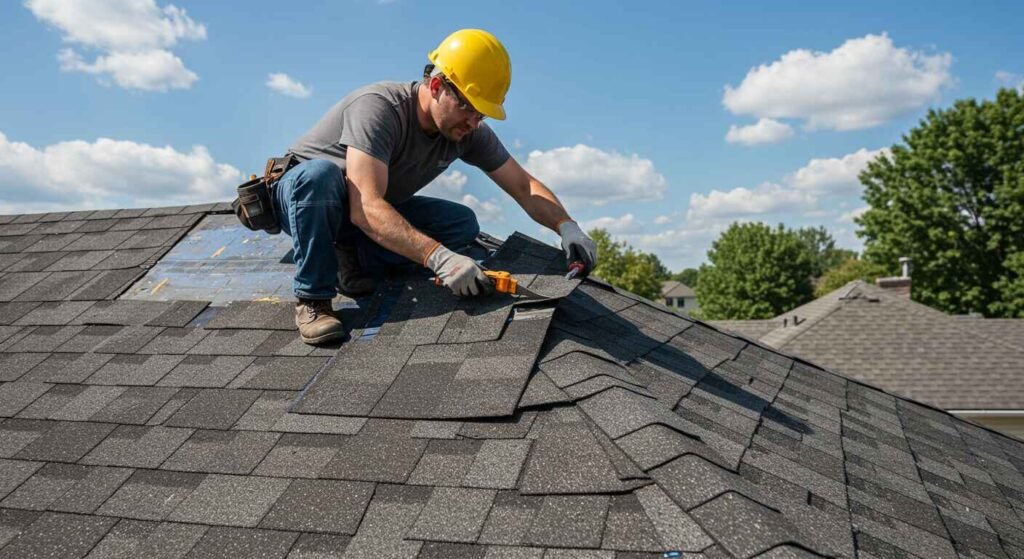
Repairing or Replacing Damaged Asphalt Shingles
This is the most common type of partial roof repair.
- Break the Seal: On a warm day, carefully use a pry bar to break the sealant bond of the shingles directly above the damaged one.
- Remove Nails: Gently lift the overlapping shingle and use the pry bar to carefully extract the nails holding the damaged shingle in place.
- Remove the Old Shingle: Slide the damaged shingle out from underneath the one above it.
- Install the New Shingle: Slide the new shingle into position, ensuring it aligns with the surrounding shingles.
- Nail It Down: Secure the new shingle with four roofing nails placed just below the sealant strip, ensuring the nails will be covered by the overlapping shingle.
- Reseal: Apply a dab of roofing cement under the tabs of the overlapping shingles to secure them to the new one.
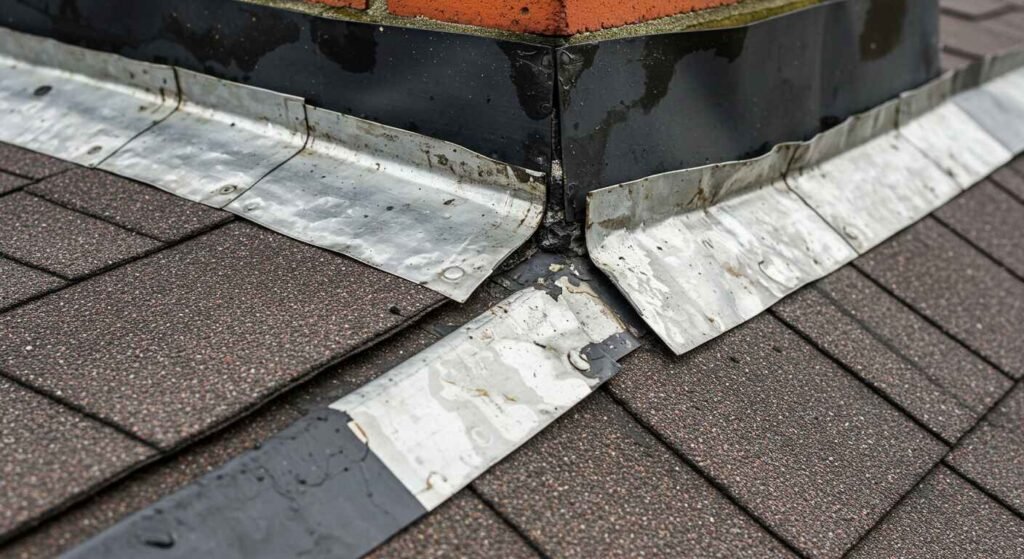
Addressing Localized Flashing Leaks Around Chimneys and Skylights
Flashing is the metal material that directs water away from joints and penetrations. Leaks here are common. For minor gaps, clean the area thoroughly and apply a generous bead of high-quality roofing sealant. If the flashing is bent or corroded, you may need to carefully pry it up, apply sealant underneath, and press it back down, securing it with new roofing nails into the decking.
Patching Small Holes, Punctures, or Tears
For small punctures in an otherwise healthy shingle, a patch can suffice. First, clean the area around the hole to ensure good adhesion. Next, use a putty knife to apply a thick layer of roofing cement into and around the hole. If the tear is larger, cut a small patch from a spare shingle and press it firmly into the cement, then apply another layer of cement over the edges of the patch to seal it completely.
Minor Repairs to Eaves, Fascia, and Soffit
Damage at the roof’s edge, such as peeling paint or minor rot on the fascia board, can often be repaired without extensive work. Scrape away any loose paint and rotted wood. Apply a wood hardener to the affected area, followed by a wood filler to smooth the surface. Once dry, sand it smooth, prime, and paint to match the existing trim. This small repair can prevent water from seeping into the roof structure.
Post-Repair Evaluation and Long-Term Roof Maintenance
Completing the repair is a major accomplishment, but a few final steps are necessary to ensure its longevity and protect your home. Proper evaluation and proactive maintenance are key to avoiding future issues.
Verifying the Repair and Ensuring Weather Sealing
After the repair is complete and the sealant has cured, conduct a final inspection. Press gently on the new shingles to ensure they are secure and the seals are holding. Check that all nail heads are covered or sealed. To test for leaks, you can gently run water from a garden hose on the area above the repair (not directly on it) and have someone inside check the attic for any signs of moisture.
Managing Aesthetic Appeal and Curb Appeal
A new patch of shingles will often look brighter than the weathered surrounding roof. This is normal. Over time, sun and weather exposure will help the new material blend in. While a perfect match is difficult, getting as close as possible during the material sourcing phase is vital for maintaining your home’s overall curb appeal and value.
Understanding Warranty and Insurance Implications
It’s important for homeowners to understand that performing a DIY repair may void any existing warranty from a professional roofing contractor. Before starting, review your warranty documents. Additionally, document your repair process with photos before and after. This can be useful information for your homeowner’s insurance policy, should a future claim arise in a different area of the roof.
Proactive Home Maintenance and Future Prevention
The best repair is the one you never have to make. Engage in proactive home maintenance to extend the life of your roof. This includes cleaning your gutters twice a year to prevent water backup, trimming overhanging tree branches to avoid limb damage, and conducting biannual visual inspections of your roof from the ground to catch potential problems early.
Budgeting, Professional Expertise, and Strategic Decisions
Making a sound decision about your roof involves balancing your budget, your skills, and the long-term health of your home. Understanding the financial and strategic trade-offs is key.
Costs and Budget Considerations for Partial Repair
A significant driver for DIY repair is the potential for savings. The costs for a partial repair are primarily limited to materials and any tools you may need to purchase. According to This Old House, professional roof repairs can range from a few hundred to nearly two thousand dollars. By doing the work yourself, you can often complete a minor repair for under $100, making it a highly cost-effective option for your budget.
Partial Roof Replacement vs. Full Roof Replacement: Making the Strategic Choice
The decision between a major partial roof replacement and a full replacement depends on three factors: age, damage, and future plans. If your roof is under 15 years old and the damage is confined to a single slope due to an event like a storm, a partial replacement might be a strategic choice. However, if the roof is older and showing signs of wear across multiple areas, a full replacement is a better long-term investment.
Leveraging Professional Roofing Contractor Expertise
Knowing your limits is a sign of a smart homeowner. If the damage is more extensive than you initially thought, if it involves structural components, or if you simply don’t feel safe performing the work, do not hesitate to call a professional roofing contractor. The demand for skilled professionals remains strong, with the U.S. Bureau of Labor Statistics projecting continued growth in the field, ensuring qualified experts are available to help.
Conclusion: Empowering Your Roof Repair Decisions
A damaged roof requires immediate attention, but it doesn’t always require a massive investment. A well-executed partial roof repair is a powerful tool for homeowners, allowing you to address problems efficiently, protect your property, and manage your budget effectively.
Recap of Key Takeaways
The path to a successful DIY roof repair is built on a foundation of careful assessment, unwavering commitment to safety, and meticulous execution. By identifying localized damage on an otherwise healthy roof, gathering the correct tools and materials, and following proven repair techniques, you can solve many common roofing issues. Remember to verify your work and commit to regular maintenance to prevent future problems.
Final Guidance for Homeowners
Empowerment comes from knowledge. This guide provides the framework for you to confidently evaluate and perform your own partial roof repairs. By taking a proactive role, you not only save money but also deepen your understanding of your home’s systems. As the roofing market continues to grow, maintaining your roof’s integrity is a sound investment in your home’s future. Whether you choose to DIY or hire a professional, making an informed decision is the most important step of all.